


Chase-it seamlessly connects with your accountancy package so you can see which invoices are overdue and need to be chased.
1. Set up your Chase-it schedule
- You’ll be able to access, activate, pause and edit your chasing schedule by going to Chase-it > Your Schedules.
- Know-it will provide you with ready-to-go templates, but you can create your own or edit them. See how here.
Set up a reminder before the due date of the invoice:

Set up a chase for overdue invoices. To get started, Know-it suggests 3 different chases. You can edit the frequency or add a reminder.
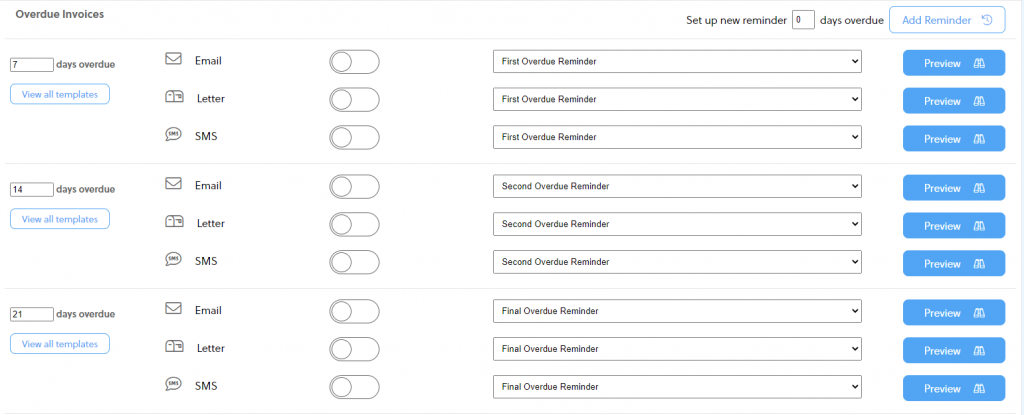
Set up an initial chase: will be sent for overdue invoices that have not had any chasers before.

For each chase, you’ll be able to:
- select a template
- select the number of days before/after the due date the email is set to be sent
- select via which medium you want to reach your customer (email, letter, SMS)
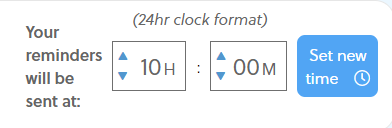
Once this is set up, you can choose when those emails/letters/SMS will be sent out. (For letters to be sent out on the correct day, make sure to set up the timing before 15h00m/3 pm)
2. Manage who you are chasing
- Once the Chase-it schedule is set up you’ll be able to decide if you want to pause/resume the chase for certain customers.
- To do so, head out to Chase-it > Invoices
- There, you’ll have an overview of the invoices linked to each customer.
2.1 Pausing a chase
- You can choose to Pause all chasers for a customer, or only Pause a specific invoice (see picture below).
⚠ Once you Pause a chase, you’ll see that the Chase schedule is paused and red.

2.2 Resuming a chase
- You can choose to Resume all chasers for a customer, or only Resume the chase for a specific invoice (see picture below).
⚠ Once you resume a chase, you’ll see that the Chase schedule is active and green.

3. Things to consider when scheduling Chase-it
- There is a buffer time of 48 hours between two chasers. Invoices that have been sent a chaser will not receive another one for 48 hours.
- Reminder should be scheduled at least 20 mins before sending.
- If you are missing any contact info that would prevent you from chasing your customer you will see an issue being raised next to your customer’s name.

4. Outbox
The Outbox allows you to keep track of the reminders that have been sent, scheduled to be sent or failed.

You can access the Outbox via Chase-it > Outbox
You can also have a quick overview of the reminders that have been sent via your main dashboard. Just select the date range that you want to filter and look at the Chase-it section of the dashboard.

Click here to know more about our Outbox function.
Contact us if you have any questions, or need any help setting up your automated reminders.